Stream setup
Your Stream, Set Up Right
The best Chaturbate OBS settings are the ones your camera, computer and connection can sustain throughout a real broadcast. A sharp preview is only one part of that system: your voice needs to be clear, the stream must reach the platform reliably, and your controls should feel familiar before anyone arrives. This guide builds a practical setup from the room outward. You will establish a sensible 720p starting point, understand what bitrate and encoding actually change, rehearse safely, and diagnose problems without changing twenty settings at once. The worked examples are testing routines, not promises that one configuration fits every computer.
Start with the picture you want to make
Before opening OBS, decide what the camera needs to see. Sit or stand where you normally host and frame the space you actually use. Check the edges for private documents, reflective surfaces and distracting clutter. Leave enough room above your head and beside your hands for ordinary movement. A composition that only works while you remain perfectly still will become frustrating halfway through a conversation.
Put a soft light in front of you, slightly to one side, and compare the picture with the ceiling light on and off. A bright window behind you can pull attention away from your face; move the setup or control that light first. Use a sheet of plain white card as a cheap reflector if one side is too dark. Keep fabric and paper safely away from hot lamps.
Photograph the finished setup and note the light positions so you can repeat it tomorrow. Spend money after identifying a specific limitation: your first useful upgrade may be moving the desk rather than buying another device.
Budget your upload connection
Upload speed sends your broadcast outward; download speed mainly describes traffic coming in. Measure upload several times at your normal streaming hour, with the computer in its usual location. Record the lower repeatable results instead of celebrating the highest single number. If other people share the connection, repeat one test while their normal evening activity is happening. A quiet morning test can hide the conditions your show will face.
Think of bitrate as a steady delivery commitment. A 3000 kbps video stream needs roughly 3 Mbps for video alone, with audio and network overhead on top. On a connection that repeatedly sustains 6 Mbps upload, a 3 Mbps video starting point leaves much more room than a 5.5 Mbps setting. This arithmetic is a planning example, not a guarantee that the route to Chaturbate remains stable.
OBS recommends wired networking and notes that dropped frames can reflect an unstable route or insufficient capacity for the selected bitrate. Start by pausing your own large uploads and cloud backups, then test Ethernet if available. Keep a lower-demand fallback profile ready. The official OBS connection guide ↗ explains why a fast speed-test result alone cannot rule out a streaming problem.
Build one clean scene before adding extras
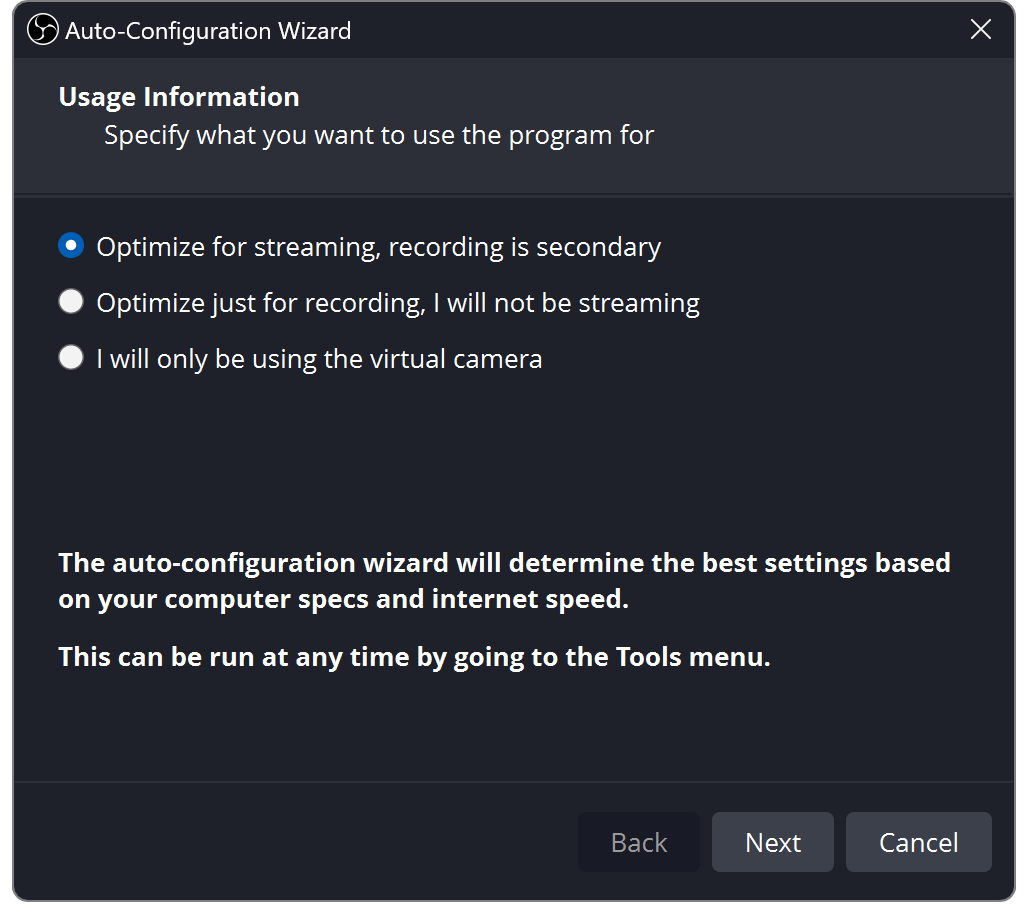
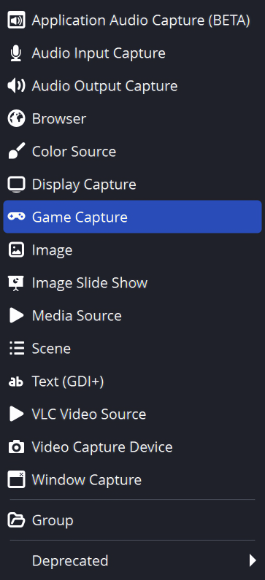
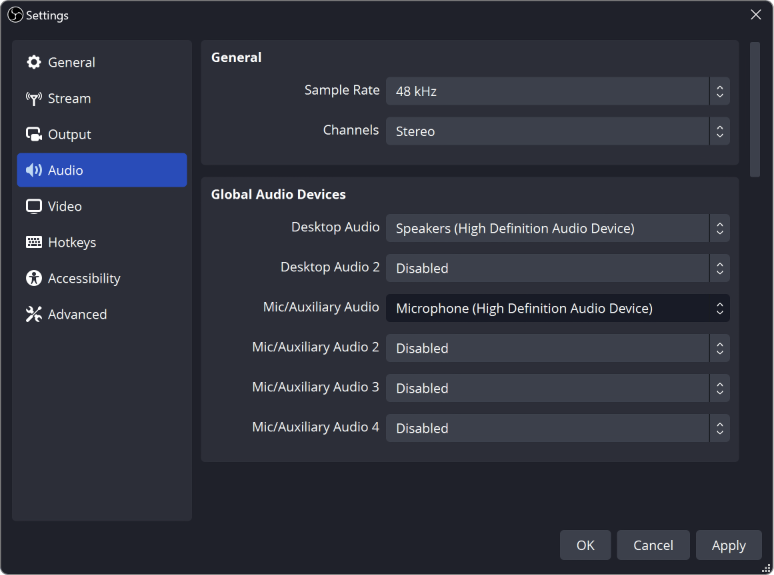
Download OBS from the official OBS website ↗. Its Auto-Configuration Wizard is a useful first pass, available again through Tools. Add a camera source and explicitly select the microphone you intend to use; confirm the audio meters react to your voice. The OBS quick-start guide ↗ shows the Sources, Audio Mixer and Controls areas you will use most often.
For your first scene, use only the camera, your chosen microphone and any essential label. Give sources names that describe their job, such as Main camera and Desk microphone. Lock the camera after positioning it. Avoid adding a full desktop capture just because a tutorial includes one: a camera-based room rarely needs to show your notifications, other browser tabs or account settings.
Create a separate rehearsal scene before experimenting with overlays. Keep a small note of which audio devices are meant to be active in each scene. An empty-looking pause screen can still carry a microphone if you have left audio enabled elsewhere, so rehearse the sound as well as the picture. Add one new source at a time and check its purpose before keeping it.
Use a clear 720p baseline
Chaturbate's published OBS starting point is 1280 × 720, 30 fps and 3000 kbps video. Its guide lists 3000–5000 kbps video with 96 kbps audio for 720p, and 5000–8000 kbps video with 128 kbps audio for 1080p. It also says not to upscale beyond your camera. Use those figures as a test baseline, then consult the current Chaturbate OBS guide ↗ before changing resolution.
The base canvas is the space where you arrange the scene; output resolution is what you send. Begin with both at 1280 × 720 to avoid unnecessary scaling while you learn the controls. Keep the aspect ratio consistent. If a source looks stretched, fix its fit or crop rather than pulling only one side until the edges touch. Your face should keep its natural proportions.
Save a reference recording and name it with the resolution, frame rate and bitrate. Later, compare an upgrade against that same scene, lighting and movement. Evaluate it at a normal viewer size, not only full-screen on your editing monitor. If the improvement is hard to notice but the computer works much harder, your original baseline may be the better live configuration.
- First test: 1280 × 720 output, 30 fps, 3000 kbps video.
- Match the source and composition; do not stretch the camera image.
- Change one setting, record the result, then decide whether to keep it.
Separate encoding from internet speed
The encoder compresses the frames your scene produces. Bitrate controls the amount of data allocated to that compressed video. Upload capacity determines whether the connection can carry it. Changing an encoder does not magically increase your internet connection, and buying faster internet does not automatically fix a computer that cannot render the scene in time. Keeping these jobs separate makes troubleshooting much less random.
OBS supports software encoding and hardware encoders available on compatible equipment. Hardware encoding can reduce CPU work, but the options and quality depend on the device and its generation. Follow the service's supported format and select an available compatible encoder rather than assuming the most expensive graphics card is required. The official OBS hardware-encoding guide ↗ explains this distinction without requiring one brand for everybody.
A useful comparison is a ten-minute rehearsal with the same camera, movement and open applications. Note processor load, whether OBS reports missed or skipped frames, and whether the recording feels smooth. Stop the test before changing the encoder, save the working configuration, and repeat. Avoid testing a new encoder, a new resolution and a complex animated overlay simultaneously; you would not know which change caused the result.
Make camera focus and exposure predictable
In your camera source properties, confirm the actual device, resolution and frame rate. OBS notes that unsupported resolution or frame-rate combinations can leave a capture source blank. Camera drivers may expose additional controls through Configure Video. Available choices vary by device and operating system, so use your camera's documentation alongside the OBS video-capture guide ↗. Do not copy a stranger's complete settings panel without checking your own hardware.
Watch what happens when you lean forward, move a hand near the lens and sit back. If focus keeps jumping to the background, test a more suitable autofocus mode or a fixed focus position that covers your normal movement. If your brightness pulses whenever a bright object enters the frame, test a stable exposure after arranging the lighting. Check each adjustment in motion, not only while looking at a frozen picture.
Color consistency matters more than an elaborate filter stack. Compare your skin tone with your actual room light and avoid mixing several strongly different light colors unless that is intentional. If the picture flickers, test the light source and the camera's anti-flicker options. Record the chosen setup in a small settings note so the next driver reset does not become another hour of guessing.
Make your voice easy to listen to
Record your normal speaking voice before adding filters. Move the microphone closer within its recommended working distance, then adjust gain. Listen for fan noise, room reflections, keyboard taps and clothing contact. A microphone hidden far away may need more gain and pick up more room sound. Try moving it a little out of frame rather than trying to repair everything electronically.
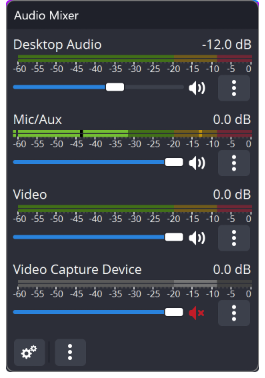
OBS's Audio Mixer guide ↗ explains the meters, clipping and the difference between a loud-looking meter and comfortable listening. Keep voice intelligible above background audio, leave room for louder reactions, and listen to a recording with headphones. A single microphone should not accidentally arrive twice through a global device and another capture source. If the result echoes, inspect the active paths before adding another filter.
Make the rehearsal realistic: speak quietly, laugh, turn your head and use the keyboard. A noise gate that sounds clean while you speak loudly might cut off quieter syllables. A compressor can control peaks, but excessive processing can make speech tiring or unnatural. Change one filter at a time and compare against the untreated recording. Clear, comfortable conversation is the target; a permanently full meter is not.
Rehearse locally and protect the files
Use Start Recording for a private local rehearsal; do not use Start Streaming as a substitute for a test button. Check the recording path and available disk space first. OBS's recording guide ↗ recommends MKV for resilience if a recording is interrupted and explains how to remux it to MP4 afterwards. A separate recording configuration can add computer load, so test the configuration you actually plan to use.
Record five to ten minutes that include ordinary movement, quiet speech and your usual controls. Replay the beginning, middle and end. Look for a delayed voice, drifting synchronization, focus changes and audio that disappears when you change scenes. A visible clap gives you a simple reference for whether picture and sound arrive together. Keep any offset adjustments documented so you do not accumulate mystery corrections.
Local recordings may contain private room details even when they were never streamed. Store rehearsals in a folder you control, check whether that folder syncs to a cloud account, and remove unwanted takes deliberately. If you share a troubleshooting clip, review it first and crop out account settings. Save one clean technical sample so future comparisons do not require keeping every rehearsal indefinitely.
Build a small system you can maintain.
Connect the stream key, then go live deliberately
Open Broadcast Yourself, choose the external-encoder information and copy the current token into OBS's Chaturbate stream-key field. Starting Streaming can make the room public even when the website is closed. Logging out does not stop OBS; finish with Stop Streaming and confirm the room is offline. These are essential details in Chaturbate's connection instructions ↗.
Treat the key as an account secret. Do not place it in a tutorial screenshot, shared settings file or support message. If you need to show the Stream settings panel, conceal the key before capturing the image. Keep your broadcasting browser and private everyday browser activity separate enough that switching windows during a session does not expose unrelated information.
Before the first real start, read your room topic, select the intended scene, check the microphone and make sure the camera is ready. Once live, inspect the viewer-facing stream and the platform's status. If you listen through another device, use headphones or mute its playback to avoid feedback. At the end, check both OBS and the platform rather than assuming that closing a window ended the broadcast.
Diagnose the symptom before changing settings
Start with one question: is the problem visible in the local recording, the live result, or both? A clean recording with an unstable live stream points you toward the delivery path. A choppy recording suggests you should inspect the scene and computer workload as well. A blurry but smooth picture calls for a different investigation from a stream that freezes and disconnects.
For network dropped frames, check competing uploads, wired connectivity and whether the selected bitrate is sustainable. For rendering or encoding overload, reduce unnecessary scene complexity and test a lower output demand. OBS's performance guide ↗ distinguishes computer-resource problems from network delivery. Do not keep increasing bitrate to solve every symptom; it can make an already strained connection worse.
Write a short incident note: time, selected profile, symptom, OBS warning and what changed. Make one adjustment and repeat a comparable test. If a fault persists, collect the relevant OBS log through the application's Help menu and review what you are sharing before asking support. A specific description such as audio clear, picture freezes after five minutes is more useful than saying the stream looks bad.
| What you notice | First check | Useful next test |
|---|---|---|
| Sharp local recording, live freezes | Connection and network dropped frames | Pause competing uploads; test a lower sustainable bitrate |
| Local recording and live both stutter | Rendering or encoding load | Simplify the scene; repeat with lower output demand |
| Smooth but soft picture | Focus, lighting and scaling | Compare the camera source with a matching-resolution recording |
| Echo or doubled voice | Duplicate audio paths | Mute one suspected path and make a short recording |
Upgrade only the part that limits the result
After several stable sessions, choose one meaningful improvement. If people cannot hear quiet speech, work on microphone placement before moving to 1080p. If focus is inconsistent, investigate the camera. If the picture is already clean on a phone but sessions disconnect, prioritize connection reliability. Use actual observations instead of turning every equipment recommendation into a shopping list.
Test a higher resolution in a duplicate profile and retain the working baseline. Compare a short clip with similar light, framing and movement. Ask a trusted person to evaluate the viewer result without telling them which version is supposed to be better. You are looking for a visible improvement that remains stable, not simply a larger resolution label.
When you do buy equipment, check the compatibility that affects your own setup: operating system, USB connection, physical mounting, driver support and the ports already occupied. Leave time to test it before an announced session. An affordable device you know how to position and control can be more useful than unfamiliar premium hardware introduced five minutes before going live.
Keep a repeatable pre-stream routine
Turn your successful setup into a short routine. Arrange the room from the reference photo, confirm camera and microphone selection, make a short recording, check the account's topic and schedule, and select the intended OBS profile. Keep the checklist visible near the monitor. The purpose is to catch ordinary mistakes quickly, not to add a long technical ceremony to every session.
After the stream, confirm the stop state and choose one change for the next rehearsal. Save working settings and device names before experimenting, so a driver update does not erase your understanding of the setup. A reliable workflow leaves more attention for your audience.
Once the technical foundation is comfortable, make the profile equally clear. A current schedule and an easy-to-read bio help visitors find their way back without asking you to repeat the same information during every session. Use our Chaturbate profile-design guide to organize that next layer around your actual room and personality.
LCD · FREQUENT QUESTIONS
FREQUENT QUESTIONS
What OBS settings should I start with on Chaturbate?
Start by testing the official 720p, 30 fps and 3000 kbps video baseline on your own equipment. Keep the camera source, canvas and output sensible, check audio separately, and increase quality only after several stable sessions.
Why is my OBS preview clear but the live stream blurry?
The preview shows the scene before the complete delivery process. Compare a local recording with the viewer-facing result, then investigate output scaling, compression and connection stability. Increasing bitrate is only useful when the connection and computer can sustain it.
Does closing Chaturbate stop an OBS broadcast?
No. Use Stop Streaming in OBS and verify the platform's status afterwards. Closing the browser or logging out is not a reliable end-of-stream control.
Do I need an expensive webcam to begin?
Start by testing the camera you have with careful lighting, framing and focus. Upgrade when you can name a limitation the new device will solve and have checked its compatibility with your computer.
Sources & further reading
- Chaturbate — How do I set up OBS? ↗
- OBS — Quick Start Guide ↗
- OBS — Stream Connection Troubleshooting ↗
- OBS — Hardware Encoding ↗
- OBS — Video Capture Sources ↗
- OBS — Audio Mixer Guide ↗
- OBS — Standard Recording Output Guide ↗
- OBS — Encoding Performance Troubleshooting ↗
Platform features can change. Check the current settings in your account.